JPG and JPEG Input
Both filename extensions are accepted. Add up to 20 photos and arrange their page sequence before creating the document.

Turn photographs into a PDF with chosen margins and page size.
Drop files here or use the button below.
Up to 100 MB total · Files stay on your device
Preview the document here. For added content, this is a placement guide; check the saved output.
Turn JPG or JPEG photographs into an ordered PDF. Choose paper size and margins to prepare a set of receipts, camera photos or document snapshots for a single upload. Each photograph occupies its own page and keeps its proportions.
JPG uses lossy image compression, so small printed text may already contain artifacts before conversion. Converting to PDF gives the images a document container; it does not reverse those artifacts or make photographed text selectable.
Both filename extensions are accepted. Add up to 20 photos and arrange their page sequence before creating the document.
Upright JPEG files are embedded without another lossy JPEG export. Photos requiring orientation normalization are embedded as PNG after decoding.
Fit each photograph inside the page margins without stretching or cropping it to fill the sheet.
Use standard paper for receipts and document photos, or match the page dimensions to each image using the selected source DPI.
Select the JPG or JPEG photos and put receipts or pictures in the required order.
Select the screenshot to enlarge it.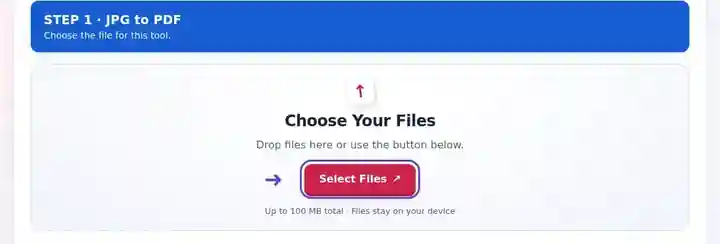
Choose a paper size, orientation and margin that suit the photographed content.
Select the screenshot to enlarge it.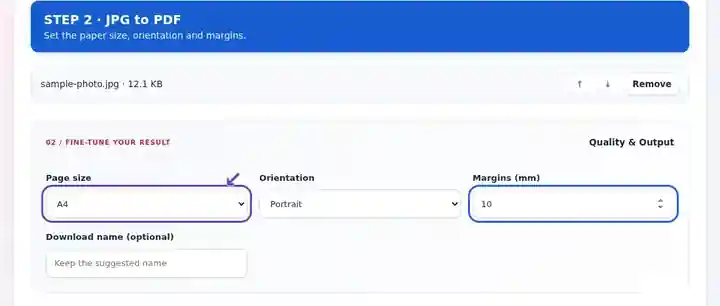
Download the PDF and check the smallest writing on every photo page.
Select the screenshot to enlarge it.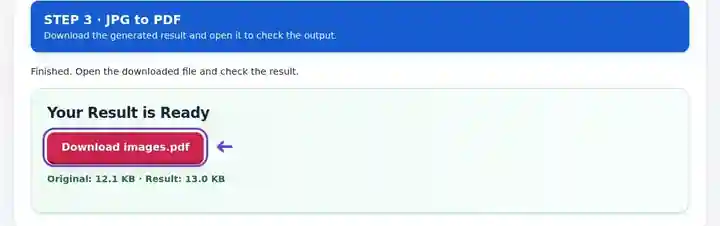
Screenshots show this toolkit using harmless sample files. Your file name, page count and settings may differ.
JPG is convenient for a camera, but a submission form may request one document rather than separate photographs. Converting gives the recipient page order and a consistent document to open or print. A receipt and a wide site photograph can still have different shapes, so allow white space rather than stretching either image. Start from the original photo where possible: the PDF container cannot undo focus problems or JPEG artifacts already present in small writing.
Place photographed receipts in the same order as the expense entries. Verify each date, supplier name and amount after conversion, especially narrow receipts fitted onto a full sheet.
Prepare permitted photographs of supporting paperwork when an approved workflow requests PDF. Check all edges and account digits, and follow the organization’s document-handling requirements.
Share an overview photograph followed by detail shots of an area under review. Use landscape pages for wide scenes and retain the original photographs separately.
| Setting | What to expect |
|---|---|
| Accepted input | JPG, JPEG |
| Processing location | Your browser |
| File selection | Multiple files, with a maximum of 20 per batch |
| Input size | 100 MB total; decoded images and pages also have pixel limits |
The decoder follows the browser’s handling of the image file, including supported orientation metadata. Check sideways camera photos in the output. Photograph flat pages with even lighting and avoid glare that makes characters impossible to read.
A landscape photograph on a portrait sheet will have more white space than on a landscape sheet. Choose page orientation to suit how the document will be viewed or printed. When converting receipts or document photographs, crop the source to the document edges first and keep all important stamps and handwritten notes visible.
| Situation | What to do |
|---|---|
| The PDF is blurry at high zoom | The source photograph may lack enough pixels, be out of focus or contain compression artifacts. A PDF wrapper cannot repair those defects. |
| Several photos appear in the wrong order | Move files earlier or later before processing. |
| The camera produced HEIC instead of JPEG | Use an available HEIC converter or export a JPEG copy from the device first. |
For three photographed receipts, check dates, totals and tax details in the originals before converting. Select a modest margin so no edge is clipped. After download, confirm one complete receipt appears on each page and that small amounts remain readable.
Both extensions are accepted. They commonly refer to the same image format.
The fit is proportional. Extra page space remains around images when the paper has a different shape.
The PDF contains images. Run OCR PDF to add a searchable text layer if that tool is available.
Continue with Image to PDF, Scan to PDF, Compress PDF.