Lossless PNG Embedding
Embed the decoded image without adding JPEG compression artifacts around screenshot text, diagram lines or logo edges.

Place PNG graphics into a PDF while retaining transparency.
Drop files here or use the button below.
Up to 100 MB total · Files stay on your device
Preview the document here. For added content, this is a placement guide; check the saved output.
Place PNG screenshots and graphics into PDF pages while keeping their image proportions and supported transparency. PNG is useful for interface screenshots, diagrams and text graphics because its compression does not discard pixels in the same way as JPG.
Transparent regions are embedded with the image’s alpha channel. They generally appear white on an ordinary PDF page. Choosing a larger paper size changes the displayed scale, not the number of pixels in the source graphic.
Embed the decoded image without adding JPEG compression artifacts around screenshot text, diagram lines or logo edges.
Keep the image’s supported transparent regions. A normal PDF page supplies the background, usually white.
Select multiple PNG files and move them into task order. Each screenshot or graphic occupies its own PDF page.
Choose standard, custom or image-matched dimensions and control the border around your graphics while retaining their proportions.
Choose PNG screenshots or graphics and arrange them in the intended reading sequence.
Select the screenshot to enlarge it.
Set page dimensions and margins while keeping the screenshots’ proportions.
Select the screenshot to enlarge it.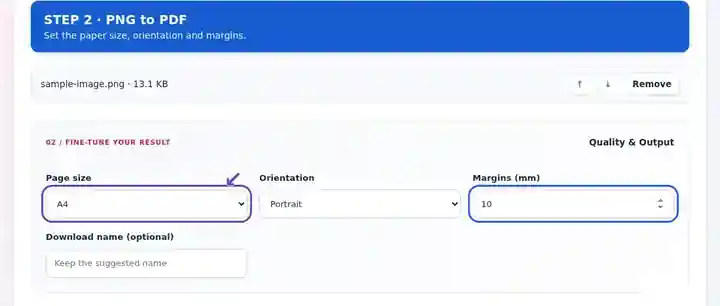
Download the PDF and inspect text labels, thin lines and transparency against the page.
Select the screenshot to enlarge it.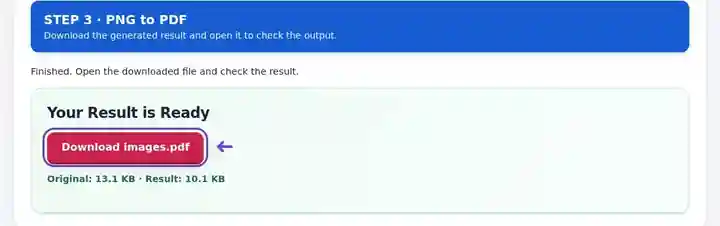
Screenshots show this toolkit using harmless sample files. Your file name, page count and settings may differ.
A screenshot usually contains fine labels and hard-edged interface elements. PNG avoids adding JPEG artifacts when those pixels are saved, making it a useful starting point for an illustrated guide. A PDF then packages the screenshots into an ordered document that readers can open without a design application. Capture enough original pixels for the smallest labels; lossless embedding preserves existing detail but does not create detail missing from a small screenshot.
Turn a sequence of interface screenshots into a troubleshooting attachment. Remove private account information from the source screenshots and confirm that menu labels can be read without extreme zoom.
Submit exported block diagrams or annotated circuit images together. Review thin connecting lines and labels after the graphic is fitted to the selected paper.
Share logo variants or interface mockups as viewing pages. Check translucent shadows against the PDF background, and keep the editable design file for revisions.
| Setting | What to expect |
|---|---|
| Accepted input | PNG |
| Processing location | Your browser |
| File selection | Multiple files, with a maximum of 20 per batch |
| Input size | 100 MB total; decoded images and pages also have pixel limits |
Large screenshots can consume substantial browser memory when decoded. Limit the number of very large images in one batch. If a screenshot contains private information, remove it from the actual image or redact the generated PDF before sharing.
For an interface screenshot, capture the application at a readable zoom before selecting the PNG. Adding larger paper later will not recover text captured with too few pixels. Remove unnecessary desktop borders in the source image to give the useful content more room on the PDF page. Keep enough surrounding controls to explain the action rather than cropping away its context.
| Situation | What to do |
|---|---|
| The image has excessive empty space | Trim unnecessary transparent or white borders in the source before conversion, or reduce PDF margins. |
| A small screenshot looks soft on paper | Capture a larger source or use a smaller printed size. Increasing output paper size is not a detail enhancement. |
| The PDF is larger than a JPEG version | Lossless graphics can use more space. Keep PNG when sharp text and clean edges matter most. |
A white logo on a transparent PNG can disappear against a white PDF page. Check it on a white background in the image editor first. If it needs a colored backing, add that background to the source image deliberately; transparency alone does not supply it.
The embedded PNG retains its supported alpha channel. The PDF page behind transparent areas is normally white.
Screenshot text is part of an image. Conversion alone does not create a text layer.
PNG can produce large files for photographs. JPG may be a smaller source when some loss of image detail is acceptable.
Continue with JPG to PDF, Redact PDF, OCR PDF.