Saved Scan Image Input
Select document photos or scanner exports in JPG, PNG or WebP. Capture them with your camera or scanner application before using this workspace.

Arrange document photographs into a PDF with adjustable page size.
Drop files here or use the button below.
Up to 100 MB total · Files stay on your device
Preview the document here. For added content, this is a placement guide; check the saved output.
Build a PDF from document photographs you have already captured with your phone or scanner. Arrange the images in reading order and fit them onto paper-sized pages. The tool accepts supported JPG, PNG and WebP images and processes them locally in the browser.
This is image-to-document assembly. It does not automatically detect document edges, correct perspective or remove shadows. Prepare clear photographs with all corners visible and use consistent lighting before selecting the files.
Select document photos or scanner exports in JPG, PNG or WebP. Capture them with your camera or scanner application before using this workspace.
Combine up to 20 supported images and move them into reading order. Each selected image becomes one PDF page.
Choose standard, custom or image-matched pages while retaining image proportions. Keep edge notes, stamps and signatures inside the visible source.
Build the image PDF on your device. Perspective correction, edge detection, scan cleanup and searchable text are separate preparation or OCR tasks.
Select previously captured scan images and arrange the document pages in order.
Select the screenshot to enlarge it.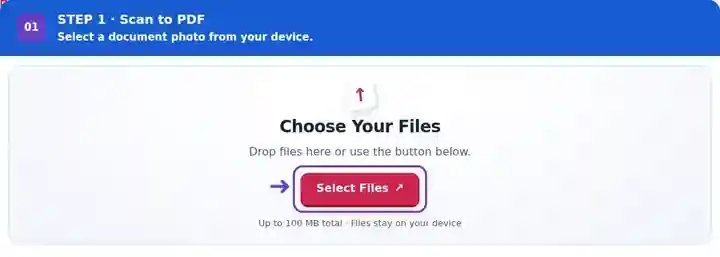
Set page dimensions, orientation and margins for complete, readable scan pages.
Select the screenshot to enlarge it.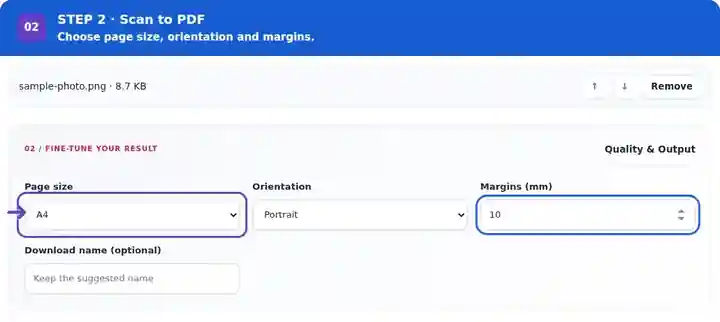
Download the PDF and inspect every page; searchable text requires a separate OCR step.
Select the screenshot to enlarge it.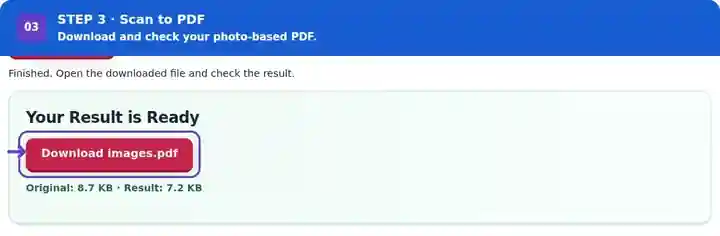
Screenshots show this toolkit using harmless sample files. Your file name, page count and settings may differ.
A form, application or expense packet is easier to review in the correct page order than as separate camera images. PDF assembly gives that set a document format, while source preparation determines whether it is legible. Retake blurred pages and correct perspective before selection; this tool does not operate the camera or clean the scan. If a portal specifies scan quality, searchable text or a file-size ceiling, check the downloaded document against those requirements.
Combine permitted copies of forms, certificates or handwritten work in the requested order. Check page completeness and the receiving institution’s requirements before submission.
Prepare a permitted scanned packet for an approved workflow. Inspect account digits, dates, edge notes and all pages; assembling scans does not authenticate the paperwork.
Organize permitted routine forms or receipts as a reading copy. Follow the organization’s handling requirements, retain originals when needed and check every handwritten entry.
| Setting | What to expect |
|---|---|
| Accepted input | JPG, JPEG, PNG, WEBP |
| Processing location | Your browser |
| File selection | Multiple files, with a maximum of 20 per batch |
| Input size | 100 MB total; decoded images and pages also have pixel limits |
Text remains part of an image until OCR is added. A phone photograph may contain background objects or location-related metadata in the source; review the generated document and crop the actual input appropriately when privacy matters.
Place a document on a contrasting, flat background so all four corners remain easy to inspect. Keep the camera parallel to the sheet, move a lamp if a stamp reflects glare and retake any blurred capture. For a multi-page form, use the same distance and lighting on each sheet so later pages do not suddenly become smaller or darker.
Name saved captures in a useful sequence before selecting them, then confirm that sequence in the workspace file list. Include reverse sides when they carry required wording and omit accidental duplicate shots. A narrow receipt can be placed on an image-matched page, while a routine application packet may be easier to print on consistent A4 or Letter sheets.
| Situation | What to do |
|---|---|
| The text is slanted | Correct perspective or retake the photograph before conversion. |
| A page looks darker than the others | Improve lighting in the source. The converter does not perform scan enhancement. |
| You need selectable text | Use an available OCR workflow after checking the assembled PDF. |
For a five-page form, photograph each page in order and compare the thumbnails before processing. Reopen the PDF and verify that every page is upright, complete and readable at normal size. Retake blurred pages before adding OCR; recognition works from the pixels you provide.
No. Capture images with your scanner or camera application first, then select those saved files.
Create and inspect the image PDF, then run OCR PDF. Choose the language that matches the source text and verify the recognized words and numbers before sharing.
Hold the camera parallel to the page, avoid glare and use enough resolution to read the smallest text.
Continue with Image to PDF, OCR PDF, Crop PDF.